Learn How To Draw A Toad Quickly
The easiest way to start this lesson is with the big, bright eyes (00 min 06 sec). They overlap each other a bit, creating that cartoony look. The pupils should be nice and small (00 min 17 sec). The brows, in turn, should be curvy and thick, just like you see in the video (00 min 26 sec). Make sure the brow on the left sits lower than the one on the right.
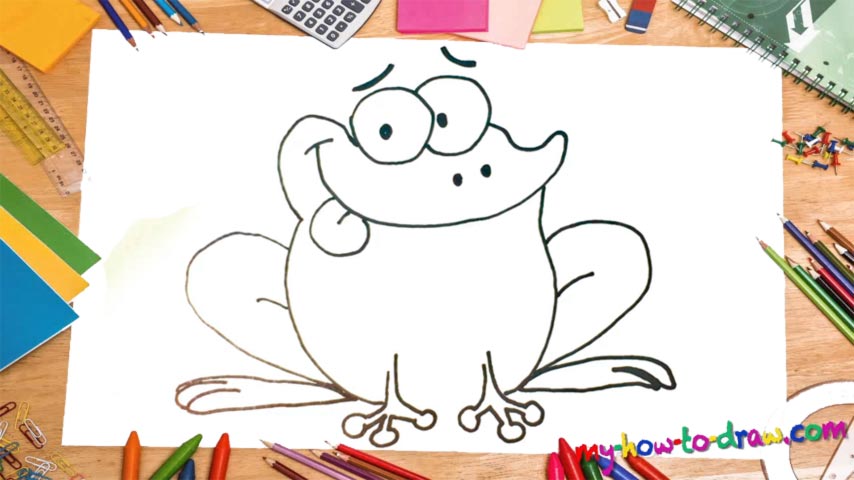
Ok, now we move on to the next part of this how to draw a Toad tutorial that includes the head, the face, and the mouth (00 min 40 sec). Take a good look at the final result: the froggy is smiling and has its tongue out. Try to make your drawing look as close to my example as possible. The two dots between the eyes and the mouth are the nostrils; the tongue is a piece of cake (00 min 54 sec).
For the main body, use two curvy vertical lines (01 min 14 sec). The front legs sit at the very bottom of the paper and are identical to each other (01 min 32 sec). The rear legs are the final stage of this how to draw a Toad tutorial (02 min 14 sec). The upper halves look like ears.
Before you learn how to draw A Toad, did you know?
We use this term to describe a huge number of frog species that come with big bumps, short legs, and dry skin. Again, this isn’t a scientific term and is used by the regular folks to describe different types of frogs, even though they are, essentially, the same. In pop culture, these creatures are very popular and loved by the audience.
There are many iconic frog/toad characters from the animated movies that we still remember and cherish. By the way, in certain Chinese communities, frogs are considered to be signs of prosperity, and the Money Toad is a well-respected being.