Learn How to draw A Minion Santa Claus Quickly & Easily!
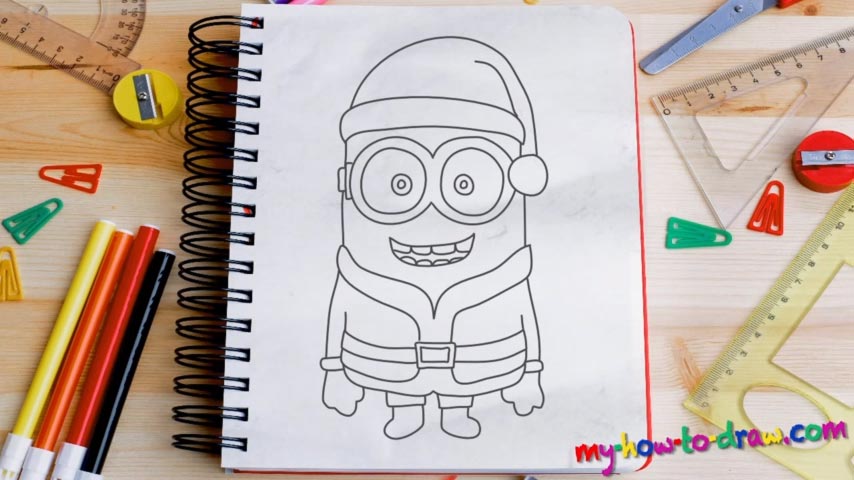
The huge gaggles on top of our hero’s eyes come first (00 min 44 sec). You’ll need four circles for each – two for the eyes, and two for the gaggles. That circle on the right is for the hat (01 min 24 sec). The mouth comes next (01 min 46 sec). The shape is very simple and not that smooth. And, you’ve got a total of eight teeth (even though the upper ones are considerably bigger, they are the same).
If everything looks good, move on to the next stage of the how to draw a Minion Santa Claus tutorial – the top of the hat (02 min 17 sec). Ok, now that the head is pretty much done, let’s get to the body (02 min 47 sec). Draw a V-like line right below the mouth for starters. Then, use two straight vertical lines to connect it to the head. The distance between that “V” and the belt should be minimal (03 min 00 sec). Put a smaller rectangle inside a bigger one for that belt.
The rest of this how to draw a Minion Santa Claus tutorial is relatively easy. The hands are both long and skinny (03 min 54 sec). The fella has gloves on, which means you won’t have to worry about the fingers. The feet, or, rather, the cute little boots come next (04 min 12 sec). They look exactly the same and will be the finishing touch to our drawing.
Before you learn how to draw A Minion Santa Claus, did you know?
It’s safe to say that the majority of the kids out there loves Santa and considers him to be a friend. When Christmas arrives, this good-hearted old man visits every single home across the planet to surprise the children with their most desired presents.
In this video guide, we combined Santa with the Minions – adorable little creatures with enormous amounts of self-esteem. Those gaggles look cute with that Christmas outfit, making for a pretty awesome holiday character. Let’s praise the Christmas spirit!