Learn How to draw Purple Guy FNAF Quickly & Easily!
This relatively easy drawing will allow you to learn some basic (and very important) techniques while having fun with it. The first step in learning how to draw Purple Guy FNAF is – yep, you guessed it – the rough sketch. Unless you’re a super-skilled artist with years of experience and know what you’re doing, always draw the guidelines.
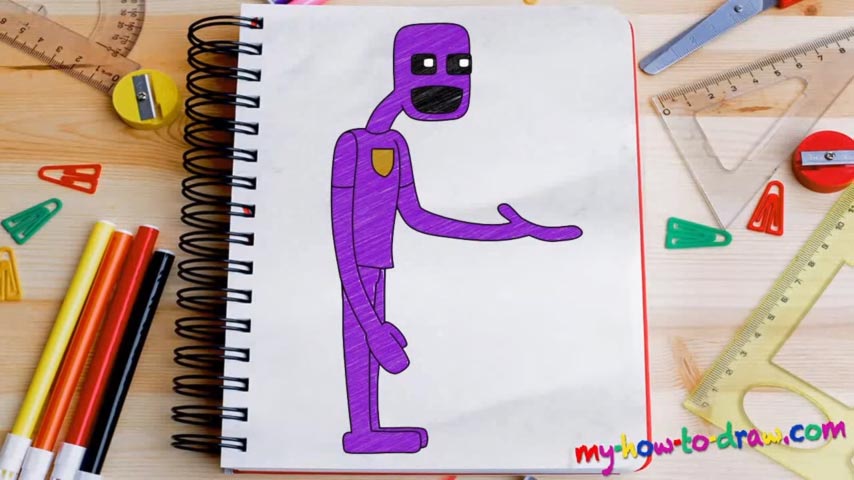
The oval shape in the top corner is the head (01 min 18 sec). Cut it into four parts and move on to the rest of the body. It’s just a combination of straight lines, curvy lines, and ovals – nothing fancy. The important thing here is to follow the video and keep the proportions and the sizes right. The actual lines don’t have to be perfect.
And now that we’re done with the introduction, let’s get to the how to draw Purple Guy FNAF tutorial. Begin with the big, rectangular eyes (03 min 29 sec). They are identical and the second one overlaps a bit with the head. This fella’s mouth is just one giant shape that you should paint black (04 min 05 sec). No nose on this one.
Before moving on to the body, finish the head and make sure the neck looks good (04 min 2 sec). That big, curvy line that represents the hand is the hardest part (04 min 50 sec). The rest is pretty easy. All the shapes in this how to draw Purple Guy FNAF tutorial, including the legs, the body, and the right arm are a piece of cake. Once you put that “badge” on his chest, you’ll master this manual (07 min 23 sec).
Before you learn how to draw Purple Guy FNAF, did you know?
This scary-looking dude is one of the greatest villains in the video-game franchise. He’s been around ever since the early days and always puts fear in the hearts and minds of the locals. His skin is rotting, and that is why it’s purple. His height is that of an average adult man, but his abilities far exceed those of a regular human being.