Learn How To Draw A Minotaur Quickly & Easily
Start by drawing a circle in the upper corner of the paper (00 min 07 sec). Then, add a half-oval right below it to complete the face (00 min 11 sec). The ears look like rugby balls; the horns are just as simple (00 min 15 sec). If you’re happy with the intro to this how to draw A Minotaur tutorial, move to the body (00 min 20 sec).
Follow the video closely and make sure you get the proportions right. A huge circle in the back for the shoulders and the chest, and four primitive shapes for each hand – that’s pretty much it for the guides. Oh, and don’t forget about the legs (00 min 40 sec). The eyes should be small, with sharp brows (00 min 50 sec).
The bull-like nose follows. Try to make the horns as “curved out” as possible (01 min 11 sec). To complete this how to draw A Minotaur tutorial, you’ll need to go over the guides with hard strokes and use wavy lines (01 min 24 sec). The fists are a bit tricky (01 min 41 sec). The feet, however, are a piece of cake (02 min 00 sec). They each have two toes.
Before you learn how to draw A Minotaur, did you know?
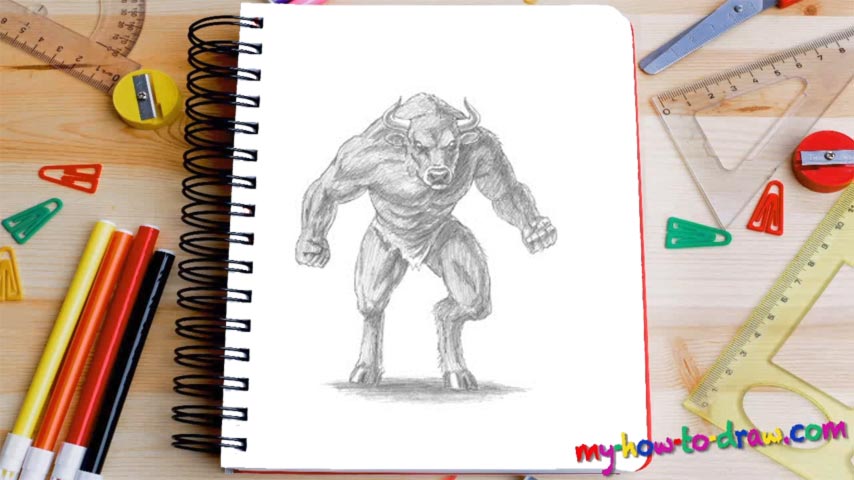
Obviously, this is a mythical creature, not a real-world animal. According to the Greeks, a Minotaur is a beast with the body of a human male and the head and tail of a bull. It’s trapped in the great Labyrinth and can never escape it. Theseus, a great hero from Athens, found a way to kill it – permanently.
However, before that, the Minotaur used to put fear in the hearts and minds of the Greek people. These days, even though the beast is not nearly as popular as in the ancient times, the Minotaur still finds its way into movies, TV series, video games, and comic books. It’s a scary being, that’s for sure.