Learn How To Draw A Great Horned Owl Quickly & Easily
To make things easier, begin this lesson by creating some guiding shapes and lines. The circle in the middle comes first (00 min 06 sec). The bigger circle and the half-oval below it will cover the body of the bird. The wings come next in this how to draw A Great Horned Owl tutorial (00 min 15 sec).
They look like horns or teeth. Before moving to hard strokes, don’t forget to add some guides for the legs and the tail (00 min 20 sec). The eyes are identical to each other (00 min 23 sec). Make sure the brows are nice and sharp to accentuate the predatory nature of the bird. The nose looks like a fang (00 min 31 sec).
The mouth sits directly below it. Use three V-like shapes to cover the lower half of the beak, the mouth, and the tongue. The ears should be pretty small (00 min 38 sec). If you’re happy with the how to draw A Great Horned Owl tutorial so far, go back to the bottom and add the scary feet (00 min 43 sec).
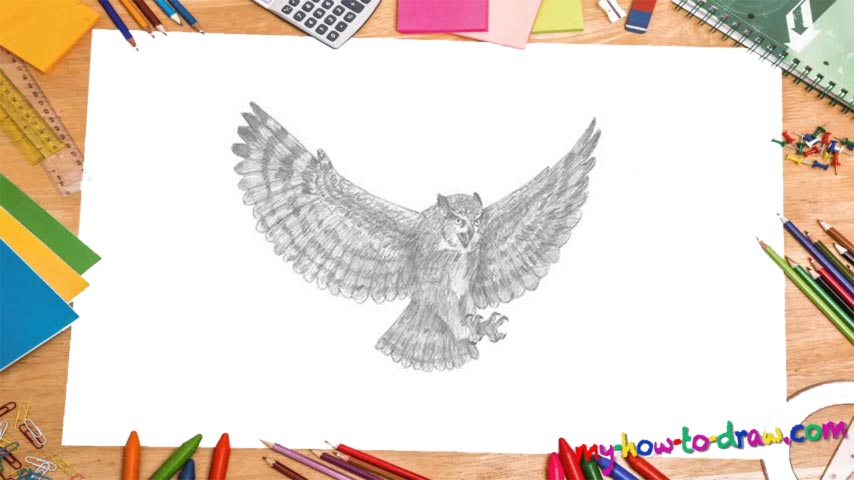
The wings are a piece of cake (00 min 57 sec). All you’ll need to do is draw a series of arcs in the lower half of each wing while leaving the top nice and straight. The same goes for the tail (01 min 14 sec). Don’t forget to erase the guides at the end.
Before you learn how to draw A Great Horned Owl, did you know?
AKA the tiger owl, the great horned owl is native to the Americas and is known as a highly adaptive creature. Rats/mice and hares/rabbits make up this bird’s primarily diet. However, this owl is equally happy to feed on other mammals, birds, and even reptiles.
In South/Central America, this is the heaviest owl, and, thanks to the intelligent brain, fast reflexes, and deadly claws, the great horned owl always manages to survive, even in the harshest situations. Interesting fact: the average weight is only 1.1 kilograms, while the average length is 120-125 cm.