Learn How To Draw A Tulip Quickly
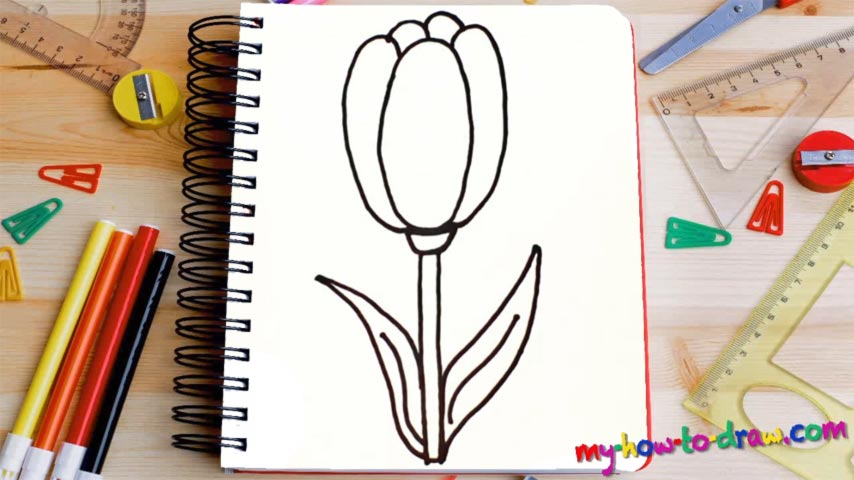
Start with the oval in the middle of the flower (00 min 07 sec). Overall, we’ve got five (00 min 17 sec). But we can’t see them as clearly because of the angle. Once you’re done with them, the upper half of this how to draw a Tulip tutorial will be done. Looks a bit like a flashlight of some sorts or an Alien egg that’s about to hatch, doesn’t it?
The stem is the next step (00 min 32 sec). Put the tiny curve first like you see in the video and only then move on to the long line. You’ll need two parallel vertical lines to complete it. The leaves on both sides of the stem are the final step of this wonderful how to draw a Tulip tutorial (00 min 50 sec). Take care of the one on the right before moving to the left.
They are very simple and won’t take more than a couple of seconds to complete. A triangle-like shape and a short line inside – that’s what you’ll need for each leaf. If you’re up for it, go ahead and color this beautiful flower. Use green for the stem and the leaves and red for the “head”. Or, you can go with yellow and white – the choice is yours!
Before you learn how to draw A Tulip, did you know?
Who doesn’t love flowers, right? The ladies most certainly do. The tradition of buying flowers for women has been around since the dawn of humanity. As for the tulips, they represent the love, the passion, and the bliss that spring brings. So, if there’s a girl you like, make sure you buy a nice bouquet for her – she’ll be impressed!
Red, yellow and white, these flowers are one of the most beautiful ones in the world, and they are very bright, a sight for sore eyes. Originally from Central Asia, the tulips have been heavily cultivated all over the world since the 17th century. They are still in large demand, and, even though a lot has changed over the years, the commons and traditions stand.