Learn How To Draw A Rubik Cube Quickly & Easily
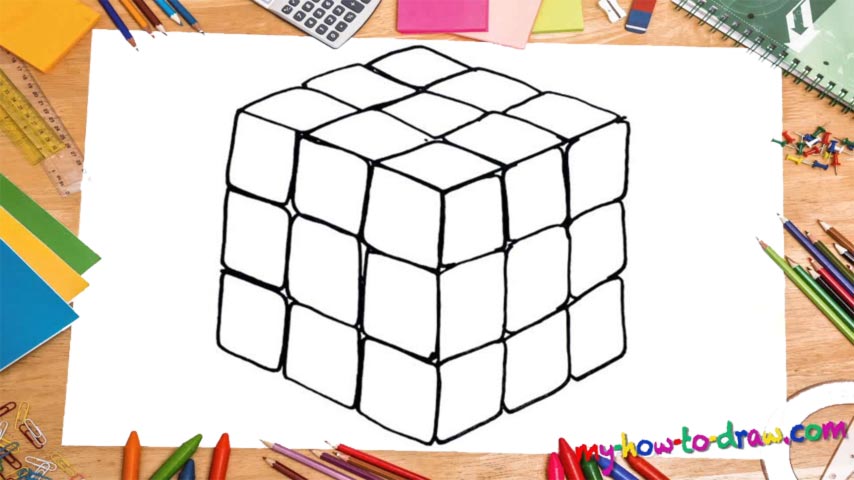
If you don’t follow the rules and do exactly what I did in the video, you’ll probably end up with something terrible. So, watch the clip closely and make sure you treat this how to draw a Rubik Cube tutorial as your guide. See those three lines (00 min 08 sec)? We’ll use them to keep our drawing in 3D. Once it’s in place, move to the right side and start adding tiny squares on top of each other (00 min 25 sec).
Try to make them equal in size for increased realism. After the first three squares are him, get to the next line and add additional three squares (00 min 45 sec). The final triplet “sits” on the far left side and concludes that side of the cube (01 min 03 sec). That was pretty easy, huh? If everything’s looking good and you’re loving the right side, go left and put in nine identical squares to complete it (01 min 22 sec).
The final part of this how to draw a Rubik Cube tutorial is the top of it (02 min 07 sec). Since we’ve successfully completed the first two sides, it will be relatively easy to finish this video guide. Again, you’ll need nine squares to cover the top corner. Now you can officially call yourself the master of the Rubik Cube!
Before you learn how to draw A Rubik Cube, did you know?
It’s safe to say that most of the planet’s population has tried to make sense of this game at least once in their lives. It first saw the light of day back in 1974; Mr. Rubik, a professor from Hungary. created it. Six years later, he sold his invention to a giant corporation.
According to statistics, over 350 million (!) Rubik Cubes had been sold around the world. By the way, it’s the best-selling puzzle game in history. Some people even claim that it’s also the best-selling toy. Who would’ve thought that an intellectual (and frustrating) game would turn out to be a success?