Learn How To Draw A Baby Dragon Quickly & Easily
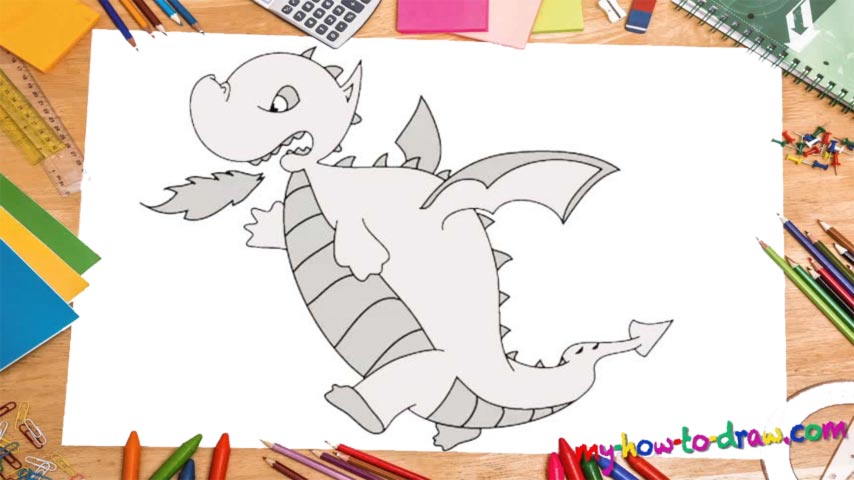
Our character has a very distinctive nose and mouth, and we’ll use a curve for that (00 min 05 sec). The eye sits right in the middle of the facial features and is accompanied by a perky line for the ear (00 min 08 sec). Connect it all to each other with a “bow” on top of the head and complete the intro to this how to draw a Baby Dragon tutorial (00 min 12 sec). The wing and the right hand come next.
If you follow my lead and put one of the feet out there before completing the rest of the drawing, it will be much easier to navigate later (00 min 16 sec). After you add the nostrils and the teeth, the easiest parts in this video guide, it will be time to take care of the beast’s body (00 min 20 sec). You’ll need three super-long lines to cover the belly, the back, and the tail (00 min 30 sec).
Take your time with this step in the how to draw a Baby Dragon tutorial, because it’s a tricky one. If you’re happy with everything, add the hands (you’ve got two of those), the legs, and move on to the spikes all over the dragon (00 min 33 sec). All that’s left to do now is draw a series of stripes on the belly and, of course, that fire coming out of its mouth (00 min 40 sec).
Before you learn how to draw A Baby Dragon, did you know?
What’s so special about little baby dragons? Not much, really: they’re simply smaller and have less experience. In this particular example, we’ve got an overzealous little brat who thinks he’s the center of the universe and can take on even the biggest and strongest champs out there :).
As you can see, the hero can already breathe fire out. And, even though it’s just a tiny “streak” instead of an all-consuming wave, if he keeps it up, our baby dragon will turn into quite a skilled warrior. As one of the most ancient creatures on the planet, he simply has to prove his worth!